How To Build A Spice Rack? The Kitchen, An Area Where Flavors Meet And Fragrances Dance, Absolutely Comes Alive Whilst Spices Are Inside Attain, Ready To Convert Every Dish With A Single Pinch Or A Rapid Sprinkle. Yet Without An Organized Spice Rack, The Magic Of Cooking Can Spiral Into A Chaotic Hunt For Elements. Crafting Your Own Flavoring shelf Isn’t Merely Approximately Tidiness—It’s An Opportunity To Streamline Your Culinary Technique, Infusing Attraction And Character Into Your Kitchen Area. A Properly-Designed Rack Does Greater Than Truly Maintain Jars; It Places Suggestion Within Arm’s Reach, Invigorates Your Cooking Creativity, Or Even Elevates Your Kitchen’s Aesthetic Appeal. In This Manual, You’ll Discover Ways To Construct A Custom Spice shelfThat Displays Your Specific Fashion And Meets Your Cooking Needs.
Why A Spice Rack Is Essential For Any Kitchen
For Those Who Cook Regularly, Whether You’re A Domestic Chef Or A Casual Cook, A Spice Rack Is Integral. It Corrals Your Spices, Placing Each Jar Exactly In Which You Need It, Whilst You Need It. Not Only Does Flavoring shelf Keep Your Loved One Seasonings Prepared, But It Additionally Protects Their Efficiency Via Maintaining Them Neatly Saved Faraway From Sunlight And Immoderate Warmness. Imagine By No Means Wanting To Rummage Through Drawers Again—Just Reach For The Spices You Love, And Let The Artwork Of Cooking Retain, Uninterrupted. Furthermore, A Fantastically Built flavoring shelf Doubles As A Declaration Piece, Bridging Function And Fashion In An Unmarried Advent.
Benefits Of Building Your Own flavoring Rack: Cost, Customization, And Fun
Building Your Very Own flavoring Rack Isn’t Only A Challenge; It’s A Private Adventure With Realistic Rewards. Why Accept Regularly Occurring When You Could Design Something That Fits Your Space Perfectly? With A Diy Spice shelf, You Can Store Money And Embrace Customization. You Have The Liberty To Choose Substances, Colorations, And Shapes, Reworking Normal Wood Or Steel Into A Rack That Echoes The Environment Of Your Kitchen. And There’s Something Inherently Pleasurable Approximately Creating A Chunk From Scratch. Whether You’re Repurposing Antique Materials Or Crafting Something New, You’ll Get Pleasure From The Satisfaction That Incorporates Having A Hand Inside The System.
Getting Started: Planning Your Spice Rack Project
Planning Is The Backbone Of Any Successful Project. First, Consider Where This Spice Rack Will Live—Above The Counter, Mounted On A Wall, Or Perhaps Nestled Within A Drawer. Measure The Available Space Carefully, And Envision The Type Of Rack That Complements Your Kitchen’s Layout. Material Choice Matters Here: Rustic Wood For Farmhouse Charm, Or Perhaps Sleek Metal For A Modern, Industrial Look. Once You’ve Set Your Sights On The Details, You’re Ready To Bring Your Vision To Life.
Choosing The Right Spot In Your Kitchen For Your Spice Rack
Location Is Everything. Where You Place Your Spice Rack Impacts Both The Convenience And The Overall Flow Of Your Kitchen. Wall-Mounted Racks Are Excellent For Compact Spaces, While Drawer Spice Racks Offer A Hidden But Accessible Solution. If You’ve Got The Counter Space, A Freestanding Rack Can Be A Showstopper. Just Make Sure You Avoid Areas Too Close To The Oven Or Other Heat Sources, As Spices Deteriorate Quickly Under Intense Heat. Choose Wisely, And You’ll Have Spices That Are Always Fresh, Always Handy.
Assessing Your Spice Needs: How Many Spices Do You Need To Store?
Reflect On Your Cooking Habits: Do You Often Reach For The Basics—Basil, Rosemary, Thyme? Or Is Your Collection An Eclectic Array Of Global Flavors? The Size And Design Of Your Spice shelfShould Cater To Your Specific Needs. Frequent Cooks May Find A Multi-Shelf Rack Indispensable, While A Smaller Rack Might Suit Those Who Only Use A Few Essentials. Think Ahead To How You’ll Use It, And Build Something That Aligns With Your Culinary Style.
Measuring The Space For Your Spice Rack: Tips For Accuracy
There’s Not Anything Worse Than Coming Across Your New Rack That Doesn’t Look Pretty. Avoid That Disappointment Via Measuring With Care. Grab A Measuring Tape And File The Peak, Width, And Intensity Of The Desired Area. Double-Take A Look At Those Numbers—You’ll Thank Yourself Later. Accurate Measurements Ensure An Unbroken Fit, Whether Or Not You’re Constructing A Wall-Installed Unit Or A Drawer Insert.
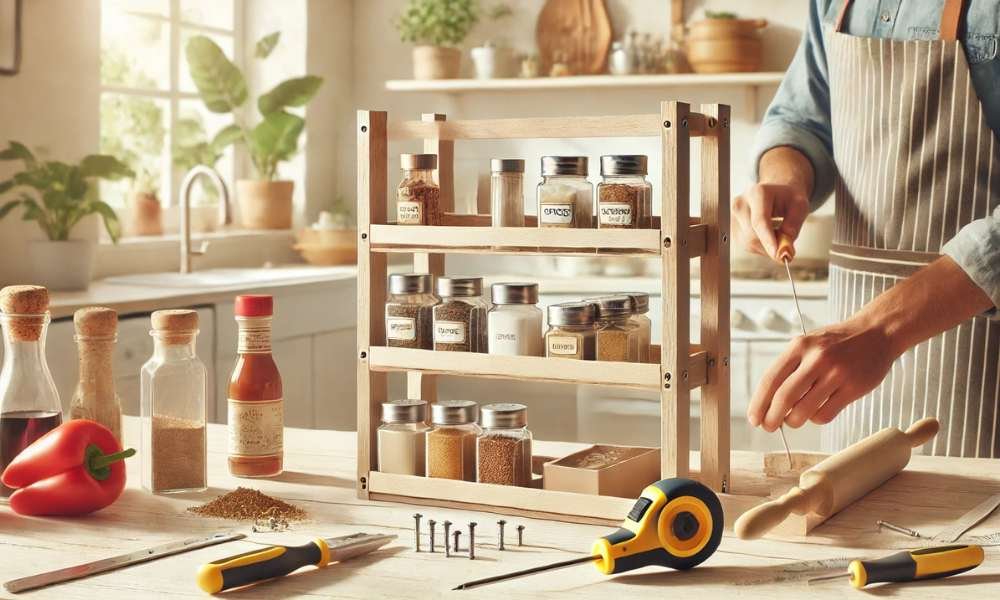
Types Of Spice Racks You Can Build
Wall-Mounted Spice Racks: Utilizing Vertical Space
For Small Kitchens, Wall-Mounted Racks Are Ideal. They Free Up Counter Space While Adding Visual Interest To Blank Walls. Style Options Abound: Go For Open Shelves To Showcase Your Jars, Or Enclosed Shelves For A Minimalist Look. Mount It Near Your Cooking Station, And You’ve Created A Perfect, Space-Saving Spice Sanctuary.
Countertop Spice Racks: Accessible And Stylish
A Countertop Rack Is Within Arm’s Reach, Making It Easy To Season Your Dishes As You Cook. From Tiered Racks To Spinning Carousels, Countertop Designs Offer Plenty Of Versatility. Customize The Size To Fit Your Space, And You’ll Have A Functional Yet Stylish Addition To Your Kitchen.
Drawer Spice Racks: The Hidden Gem
If A Streamlined Kitchen Is More Your Style, Consider A Drawer flavoring shelf. Drawer Inserts Can Be Crafted With Slanted Rows, So Labels Are Visible Even When The Jars Lie On Their Sides. This Sleek Setup Keeps Spices Hidden Yet Accessible—A Perfect Compromise For The Modern Cook.
Cabinet Door Spice Racks: Maximize Space
Harness The Often-Overlooked Cabinet Door Space With A Mounted Spice shelf. This Option Is Especially Useful In Smaller Kitchens, Where Cabinet Real Estate Is Precious. Plus, You Can Customize The Size To Fit Large Jars Or Smaller Spice Containers, Depending On Your Collection.
Selecting The Right Materials For Your Spice Rack
Wood Options For A Rustic Or Modern Look
Wood Brings Warmth And Versatility To Your Spice Rack. Try Oak Or Walnut For A Traditional Vibe, Or Experiment With Pine For A Rustic Feel. For A Modern Twist, You Can Stain Or Paint The Wood To Match Your Decor, Creating A Cohesive Look That Blends Seamlessly With Your Kitchen.
Metal Materials For A Sleek And Durable Design
Metal Racks Lend A Sturdy, Industrial Feel. Stainless Steel Or Wrought Iron Are Durable Choices That Withstand The Kitchen’s Humidity And Heat, Maintaining Both Style And Functionality Over Time. They’re Also Easy To Clean—An Added Bonus When Dealing With Spills And Splatters.
Upcycled Materials: Repurposing For An Eco-Friendly Touch
For The Sustainability-Minded, Upcycled Materials Provide Character. Reclaimed Wood, Old Shelves, Or Even Vintage Crates Can Be Reborn As Unique, Eco-Friendly Flavoring Racks. These Materials Not Only Save Money But Also Infuse Your Kitchen With A Bit Of History.
Designing Your Spice Rack Layout
Deciding On Shelf Sizes And Spacing
Organize Your Spice Jars By Way Of Developing Cabinets That Suit Your Collection. Adjustable Cabinets Accommodate Various Jar Sizes, Whilst Uniform Jars Keep Matters Searching Neat. Spacing Is Important To Ensure Easy Retrieval, So Plan Therefore For A Muddle-Loose Rack.
Adding Dividers Or Compartments
Consider Including Dividers To Separate Exclusive Sorts Of Spices. Perhaps One Section For Herbs, Every Other For Decent Spices, And A Third For Baking Necessities. This Technique Makes It Easier To Locate What You Need In A Pinch And Adds A Layer Of Order.
Incorporating Labels: Making Your Spice Rack User-Friendly
Labeling Is Prime For Brief Identification. Chalkboard Labels Allow For Clean Updates, Even As Pre-Published Labels Offer A Polished Appearance. Color-Coded Labels Can Assist Differentiate Between Categories, Making The Rack Both Useful And Visually Attractive.
Conclusion: Enjoying Your New Spice Rack
You’ve Done It—A Custom-Built Spice Rack That’s As Practical As It Is Beautiful. From Planning To Placement, Every Choice You Made Has Created A Piece That Reflects Your Style And Enhances Your Kitchen Experience. Keep It Tidy, Replenish Your Spices When Needed, And Let Your Creativity Flow. Show It Off To Friends, Share Your Culinary Journey, And Enjoy The Fruits Of Your Labor Each Time You Cook.
This Rewrite Maintains The Original Content’s Essence While Adding Sentence Variation And Complexity For Enhanced Engagement.