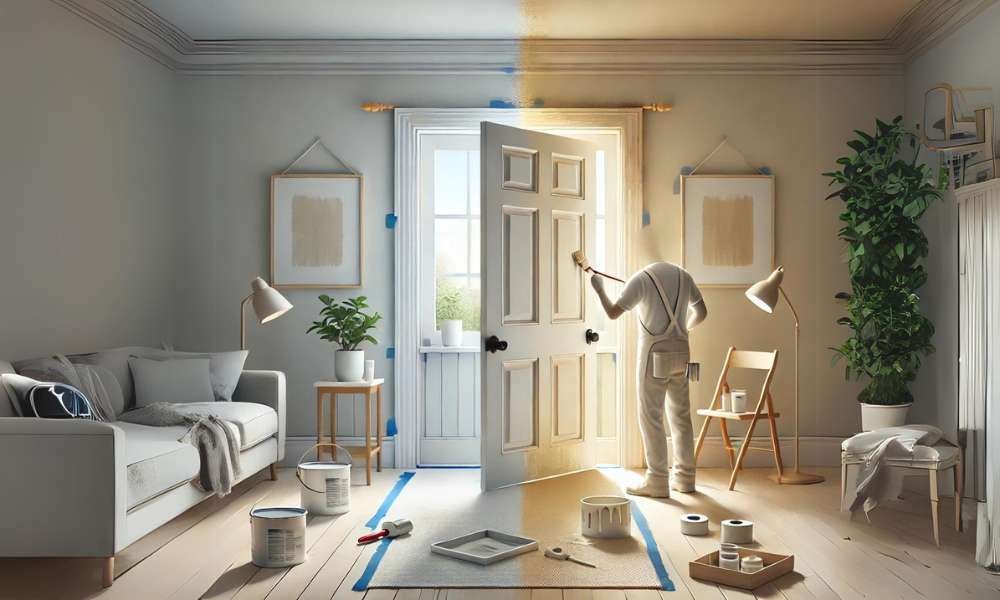
Painting An Interior Door Is A Deceptively Simple Yet Tremendously Powerful Way To Refresh The Look Of A Room. While It Could Look Like A Minor Mission, The Transformation It Brings Can Be Dramatic. A Door, Regularly Taken Without Any Consideration, Can Unexpectedly Emerge As A Hanging Focal Factor Or A Subtle Compliment To The Room’s Aesthetic. This Isn’t Pretty Much Appearances Either—A Sparkling Coat Of Paint Can Add Sturdiness, Defensive The Paint An Interior Door From Each Day Put On And Tear. Whether You’re After A Bold Splash Of Coloration Or A More Understated, Conventional Look, Painting An Indoors Door Is A Profitable Mission. However, Reaching That Ideal Finish Takes A Combination Of The Right Equipment, Practice, And Method. Let’s Dive Into A Way To Make Your Subsequent Interior Door Portray A Task As A Fulfillment.
Choosing The Right Paint And Tools
The First Step In Any Painting Undertaking Is Choosing The Proper Paint And Equipment, And For Indoors Doors, This Selection May Want To Make All The Distinction. Gloss, Semi-Gloss, Or Satin Paints Are Satisfactory For Doorways Due To The Fact They Offer Durability And Are Smooth To Smooth. Gloss And Semi-Gloss Finishes Have A Slight Sheen, Giving Your Gate A Vibrant And Reflective Fine, Whilst Satin Finishes Provide A More Muted, State-Of-The-Art Look.
Now, Onto The Equipment. A Small, Angled Brush Is Your Pass-To For The Edges And Any Intricate Info On The Door. For Huge, Flat Surfaces, A Foam Roller Is Your First-Rate Pal, As It Ensures A Smooth Software Program Without Visible Brush Strokes. Make Sure To Accumulate Crucial Sources Like Painter’s Tape (To Cowl Hardware Or Regions You Don’t Want Painted), Sandpaper (For Prepping The Door), A Drop Fabric (To Protect The Surrounding Area), A Paint Tray, And Primer. These Items Are All Vital To Reaching A Complicated, Expert-Searching End Result.
Preparing Your Door For Paint
Preparation Is Prime To Ensuring Your Paint Task Looks Seamless And Lasts For Years. Start By Getting Rid Of The Door From Its Hinges. This May Additionally Seem Like A Hassle, But It’s A Good Deal Easier To Paint An Interior Door The Gate Even As It’s Lying Flat On A Strong Surface, Like Sawhorses Or A Robust Desk. Place A Drop Material Beneath The Door To Trap Any Drips.
Next, Very Well Smooth The Door With A Gentle Degreaser. Over Time, Doors Accumulate Dirt, Dirt, And Dust, All Of Which Can Save You Paint From Adhering Properly. Once The Gate Is Clean And Dry, It’s Time To Sand. Use Medium-Grit Sandpaper To Start, And Then Transfer To Finer Grit For A Clean Finish. If The Gate Has Any Imperfections, Together With Dings Or Scratches, Fill Them With Timber Filler, Permit It To Dry, And Sand It Down Once More. The Smoother The Floor, The Better Your Paint Will Appear.
Priming: The Foundation For A Flawless Finish
Applying Primer To The Door Is A Crucial Step, Especially If You’re Transitioning From A Darker Color To A Lighter One Or Working With Bare Wood. Primer Not Only Helps The Paint Adhere Better But Also Enhances The Vibrancy Of The Color. Use A High-Quality Primer That Matches The Type Of Paint You’ve Chosen (Latex Or Oil-Based).
When Applying Primer, Focus On Even Coverage, Particularly In Recessed Areas Or Paneling, Which May Need Extra Attention. Don’t Rush This Step—An Uneven Primer Layer Can Result In A Streaky Or Patchy Final Finish. Once The Primer Is Applied, Allow It To Dry Fully According To The Manufacturer’s Instructions Before Moving On To The Paint An Interior Door.
Taping And Setting Up Your Workspace
Before You Start Portraying, Make The Effort To Tape Off Areas You Don’t Need To Color, Including Glass Panels, Hardware, Or Designated Carvings. This Step May Additionally Seem Tedious, However It’ll Save You Time Later In Relation To Contact-Ups. A Properly-Lit Workspace Is Also Critical—Good Lighting Helps You Notice Missed Regions And Ensures Even Insurance. Additionally, Make Sure Your Space Is Properly-Ventilated To Reduce Paint Fumes And Accelerate The Drying Manner.
Painting The Door Panels
If Your Door Has Recessed Or Raised Panels, Start By Painting These Areas First. Use A Small, Angled Brush To Carefully Apply The Paint, Working In The Direction Of The Wood Grain For The Smoothest Results. Brush The Paint Evenly, Making Sure To Smooth Out Any Drips Or Excess Paint Before It Dries. This Attention To Detail Will Prevent The Panels From Looking Overly Thick Or Uneven, Which Is Key To Achieving A Professional-Grade Finish.
Painting The Door’s Flat Surfaces
For The Larger, Flat Surfaces Of The Door, Switch To Your Foam Roller. This Tool Is Perfect For Ensuring A Smooth, Streak-Free Finish On Flat Areas. Roll The Paint On In Long, Even Strokes, Working From One End Of The Gate To The Other. This Method Helps Avoid Lap Marks Or Uneven Coverage. Don’t Forget To Paint The Edges Of The Gate As Well—These Are Often Visible When The Door Is Open And Should Blend Seamlessly With The Rest Of The Surface.
Applying A Second Coat
Once The First Coat Has Dried Completely, Inspect Your Work. You’ll Likely Notice Some Areas Where The Paint Appears Thin Or Uneven. This Is Normal And Is Easily Remedied With A Second Coat. Reapply The Paint Using The Same Techniques As The First Coat, Paying Extra Attention To Any Areas That Need More Coverage. Make Sure Each Coat Is Fully Dry Before Adding Another To Avoid Streaking Or Smudging The Paint An Interior Door.
Drying Time: Patience Is Key
Once The Second Coat Is Applied, It’s Essential To Provide The Door Ample Time To Dry Completely. The Drying Process Ensures That Each One Of Your Difficult Paintings Stays Intact And Forestalls Fingerprints, Smudges, Or Other Blemishes From Marrying The End. Resist The Urge To Handle The Gate Until It’s Absolutely Dried—It’s Worth The Await A Wonderful Finish.
Reinstalling The Door
After The Door Has Dried Completely, It’s Time To Reattach It. Carefully Place The Door Back Onto Its Hinges And Secure It In Place. If You Removed Any Hardware For The Painting Process, Reattach It Gently To Avoid Damaging The Paint Around The Hardware. Before You Close The Gate, Inspect It For Any Missed Spots Or Imperfections And Touch Them Up As Needed.
Maintaining Your Painted Door
Once Your Door Is Painted And Reinstalled, Maintaining Its Fresh Look Is Relatively Simple. Regular Dusting Will Keep It Clean, And For Any Scuffs Or Marks, A Damp, Non-Abrasive Cloth Should Do The Trick. Avoid Using Harsh Chemicals Or Abrasive Cleaners, As These Can Strip The Paint’s Finish. With A Little Periodic Maintenance, Your Freshly Painted Gate Will Continue To Look Vibrant And Polished For Years To Come.
Adding Creative Flair To Your Door
Feeling Adventurous? Why Not Take Your Interior Door Portraiture Project A Step Further By Including A Private Contact? Using A Couple Of Colors Can Provide The Door A Unique Appearance—Recollect Painting The Panels A Extraordinary Color Than The Body For Bringing Depth And Dimension. Or, Use Stencils To Create Styles Or Designs, Along With Geometric Shapes Or Floral Motifs. These Creative Flourishes Can Remodel Your Gate Into A Statement Piece That Displays Your Non-Public Style And Provides A Dressmaker Contact To The Room.
Conclusion: A Simple Task With Big Results
Painting An Interior Door Is An Enormously Trustworthy Mission, But The Outcomes Can Be Transformative. By Following Those Steps Carefully—From Choosing The Right Substances To Learning The Techniques For Each Panel And Flat Surfaces—You Could Achieve A Professional-Best End That Elevates The Appearance Of Any Room. With Only Some Tools, A Little Persistence, And A Sprint Of Creativity. You Can Supply Your Indoors Doorways A Whole New Existence. Turning Them Into Polished, Personalized Works Of Artwork That Reflect Your Precise Style. So Take Hold Of Your Brush, Roll Up Your Sleeves. And Get Ready To Peer Just How Effective A Coat Of Paint Can Be!